Saturday, March 27, 2010

Down by the Sea - SOUS Challenge and Peggy Challenge


I used the sketch from this weeks SOUS challenge to map out how I would make this layout. The paper is by Close to my Heart. The Tag/Title "Down by the Sea" is from 5 or 6 years ago when I attended one of the classes at the scrapbook expo. I've always loved the tag because it used real shells and rocks. I just...never used it :). I'm continuing to work on my 2006 Cruise Scrapbook. I'm a little burned out but still moving forward. I did use the cricut on this layout but only for the frame that went around the journaling and that was from the cart Storybook.


Monday, March 22, 2010

First Time Flyer

Used two sketches from March Pagemaps. I love that website! The paper packet was at Michaels. The cartridges I used were My World for the Plane, Going Places for the plane journaling pocket and title. First Time Flyer was done in the Plantin Schoolbook font. The postage stamp frame was done with the Accent Essentials cartridge.


Anchors Away - SOUS Challenge

Trying to work on doing an album from our 2006 Vacation. Used the cartridge Life's a Beach.

Sunday, March 14, 2010

Field Trip - SOUS Challenge Week 3/12

I used the cartridge Locker Talk to make this layout and the DCWV school stack. I'm trying out a new software called ArcSoft Scan-n-Stitch.

Saturday, March 13, 2010

What the Flock - How to Flock an Elmo

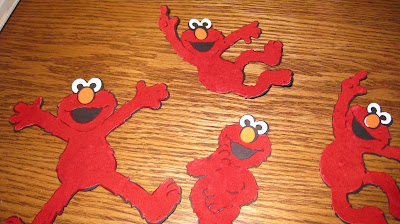
Tonight I experimented with Martha Stewart Flocking Powder. I think I've inhaled half the jar by accident, but did manage to make some pretty cool looking fuzzy Elmo's. I'll try to explain how to make these because I didn't see much in the way of Cricut Flocking instructions.

For this I used, Elmo's from Sesame Street and Friends cut at 5 inches. Before you flock, don't glue your Elmo together (I learned this the hard way, while it doesn't look bad, you get it on the black and then it doesn't look great). So leave your Black base, your red Elmo body, white eyes and orange nose separate.

You also need Glue. I used the Martha Stewart brush on Glitter Glue, but I'm pretty sure any would do. You also need Red Flock.


Take your Red Elmo Body and brush a thin layer of glue all over it.
(please note in the picture below I had glued the black....don't do that. Just do the red all by itself)


Then your going to dumb the red flock on the body. I used a bowl and a spoon to do this. I spooned the red flock all over the body and then would tap it into the bowl and repeat until elmo was completely covered in red flock. (please note...try not to inhale while doing this...lol)


Then your going to lay Elmo out to dry. Once he is dry you can glue him together just like you would normally do.


Elmo is all excited he's fuzzy!

 My Elmos were not completely dry in this picture, but I plan to take a make up brush and just lightly dusting him off to clean up any loose fuzz.


Thursday, March 11, 2010

Allstar!

Well my days have filled up with T-Ball practice, chasing Ashley since she's walking and running around the house and life in general. I took a time out to scrapbook this page. This is for the SOUS challenge this week. One of the challenges was to put Bling! So I blinged with a little bit of stickle. I used the cricut solutions cart for Baseball to make the cuts. The paper is from Close To My Heart. I'm really excited Matt is in a sport now, so I have an excuse to go to the Scrapbook store because I don't have anything themed Baseball :).